VIP Car tutorial : Aoshima Admiration Toyota Celsior 1/24. | Model Kit Index
This tutorial is for a Toyota Celsior VIP car, in this case, the Aoshima Admiration Celsior. In every case, comments refer to the photo directly above the comments. I've tried as much detail as possible within both the photos and descriptions, so if you're reading something you already know, just skip ahead.
Gallery of completed Kit.
Part 1: The exterior
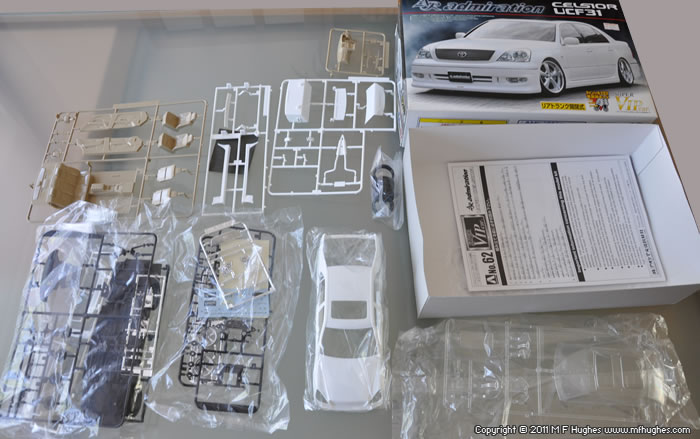
Above you can see the contents of the packets. The kit was Y2100 Yen, picked up on holiday in Tokyo during October 2009. It's a typical Aoshima Kit - fits well, lots of detail and thoughtful additions such as the large sticky sheet of chrome/reflective, for mirrors, lights etc. As with most Aoshima VIP cars, the suspension is adjustable with the aid of screws - useful but does make for a less realistic underside. The boot opens after construction. 19" alloys are Amistad V.
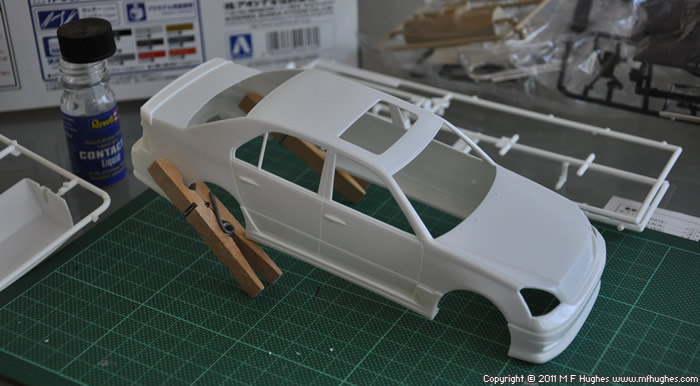
I start with the exterior of the car, the front and rear bumpers and the side skirts. Revell contacta liquid poly is my glue of choice, and it's applied to both parts and left to melt them a little before they're pressed together. Clothes pegs are used to hold the slighty warped bumper.
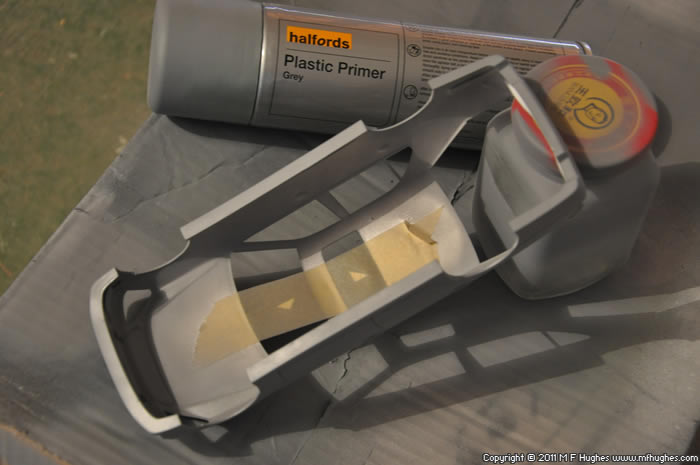
Halfords grey plastic primer is sprayed all over the body, as above. Several coats are applied.
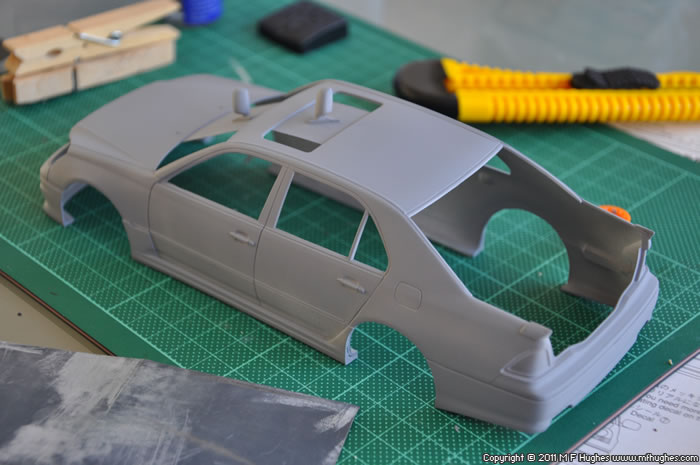
The finished undercoat. The door mirrors are taped to the car from the inside so they receive an equal number of coats of paint. The boot is also undercoated, but not shown in these pics.

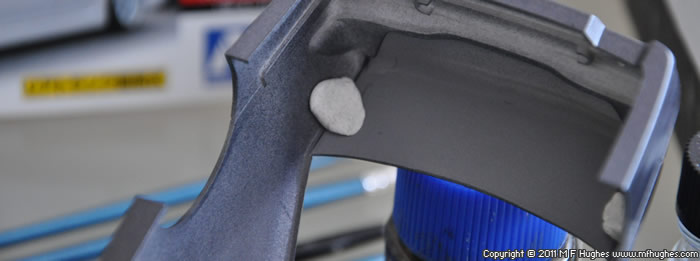
At this point I notice the front bumper is a little loose at one side. Since it clearly doesn't want to stick due to a tiny contact area, I weld it in place from the inside (A) with a hot screwdriver tip.
In order to keep the boot's number of paint coats equal with the rest ofthe body, it was blu-tacked to the inside of the body.

The exterior body parts, now all in the same place, were given 4 seperate coats (allowing for drying for several days per coat) of Citroen Meteor Grey, from a Halfords car touchup can. I liked the colour so much from my
Blitz Chaser that I decide to forego the traditional black or white VIP car colour.
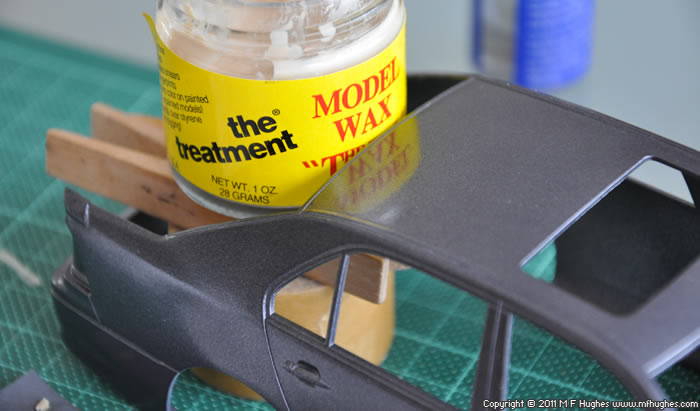
Once the final coat has had a week to dry, I polished the car with several grades of polishing cloth, 6000 and 8000. I'm wary of polishing too much for several reasons. I've polished right through the layers of paint on several kits, and what's more although I think a perfect deep shine is very nice, I sometimes wonder that if you took a real car, reduced it in size by 24 and looked at it, would the 1/24th-as-thick paintwork still have such a shine? A 1:1 shine on a 1:24 car perhaps isn't right.. although I can see why it's popular, it does look more fabulous than what I have here. Anyway, at the end I take a traditional "the treatment Model Wax "The final Detail"" photo to proove that it has at least a 1:24 level of reflectiveness.
The front grille's recessed lines are filled in with a Gundam marker in order to create the black depth. The chomed parts are all then glued into place, remembering to remove both paint and chome from the respective glue contact surfaces.
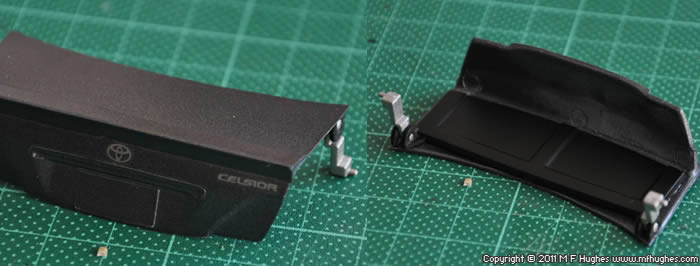
At this point I assemble the boot interior and apply the two decals to the back of the boot. I do this now as I want to give a quick spay of Mr Hobby gloss clearcoat over the back decals without interfering with what's later to be stuck to the rest of the boot.
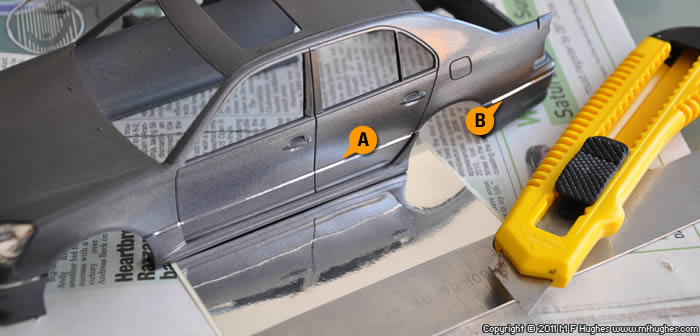
Aoshima's generous sheet of mirored sticker is cut into very thin slices and applied around the car, seen here at the side (A) and rear (B). Tweezers are used to put it in place. A very nice result. The front chrome strip is also done, but not labelled above.
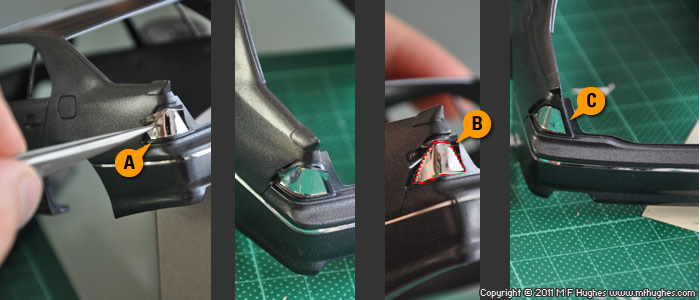
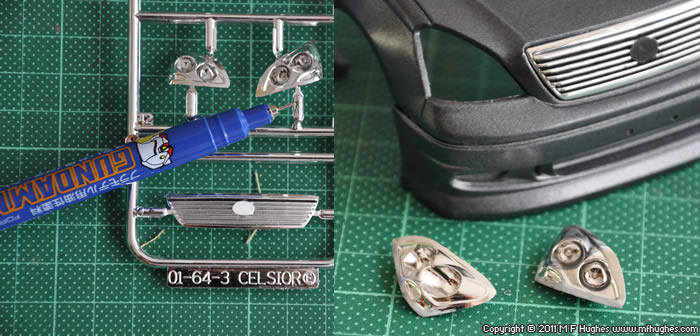
The real light clusters are chromed using the same material. A rectangle of roughly the right size is stuck in place (A). The edge of the rectangle shown at (B) with a dotted red line is scored over lightly using a craft knife with a new sharp blade. The result is shown at (C).
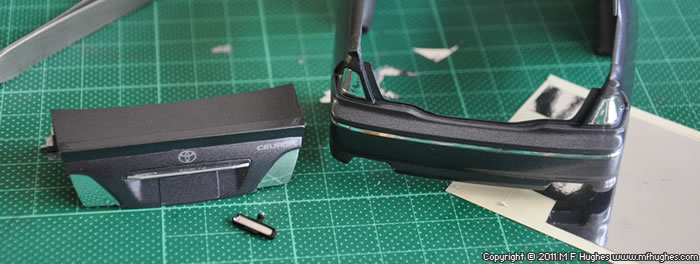
After completing both light clusters, I also chome the reflector insets of the boot, and whilst I'm at it, the rear view mirror. The door mirrors do not need this treatment as they have chome-plated plastic parts from the same sprue as the headlamps.
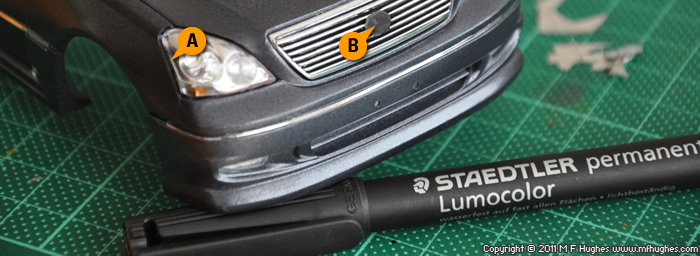
The headlamps transparent part was glued in place with the tiniest amount of Revell contacta liquid and the rubbers are drawn in using a fine Staedtler permanent marker (A). The Toyota badge oval is painted with Tamiya Flat Black acrylic, after first having had the chrome scraped from it with a knife blade. (B)
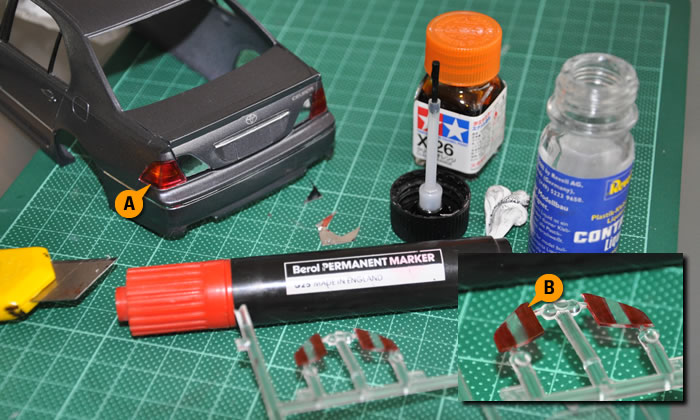
The rear light clusters are coloured in two ways - the indicators are painted with Tamiya's clear orange enamel, and the red parts are coloured with a permanent marker, which I find gives some better degree of control compared with a brush. Although the result is still only so-so I think.
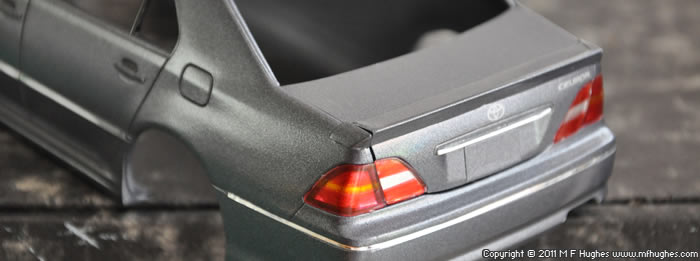
The completed rear lights
All content, text & graphics Copyright © M.F.Hughes 1995 - | Home | More Kits